How to Build A Clear Acrylic Display Case
08/19/2016
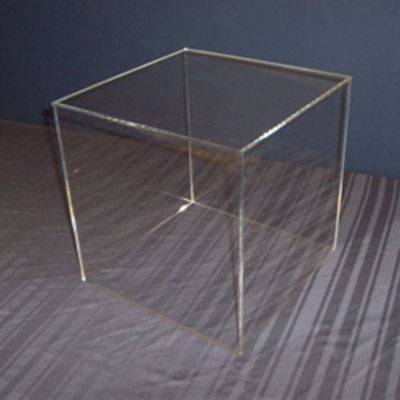
Acrylic display cases serve as a lightweight and economic alternative to their rather expensive and heavy glassed counterparts as they resistant to breakage and more realistic. Medals and such other valuable items can be enclosed in a case with a metal frame, as for other simple items such as trophies and collectibles; an acrylic display case with a wooden base will suffice.
An Acrylic shadow box, (a slightly modified version of the clear acrylic display box, is also used to display collectibles, antiques and such other priced items. However, shadow boxes are particularly designed to protect the enclosed items from being damaged by the effects of light, in addition to protection from dust and damage by onlookers.
What else can you store in the acrylic display case?
In general, clear acrylic cases can be used by retailers to display, while at the same time protecting the valuable electronic or food items. These units will often be shaped differently depending on individual requirements. They will have shelves and either swing or sliding doors with safety locks. In residential settings, apart from displaying trophies and medals, these cases can be used to display brooches, necklaces, musical instruments with sentimental value, dolls, sports memorabilia, model cars, make-up and jewelry.
One of the major problems with commercial acrylic cases is getting just the right size for your specific item or set of items. Commercial boxes often come is standard sizes and may be too big or too small for your specific situation. The good news is this problem can be easily solved by creating your own custom made display case to showcase your objects in the best possible way.
Here is what you will need.
• Measuring tape
• Table saw
• Work gloves
• Safety goggles
• Masking tape
• Solvent cement
• Safety mask
• Hinges
• Drill
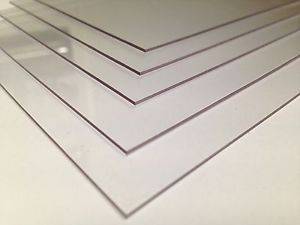
• Acrylic sheet
• Sandpaper, 120-, 220- and 400-grit
• Wood glue
• Utility knife
• Angle clamps
• Silicone caulk
• Polyurethane
• Acrylic glue
Step 1 –Design
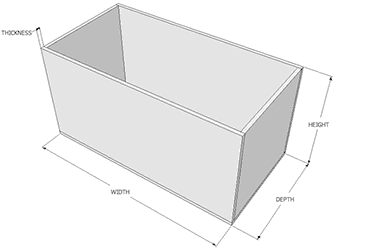
By this time I assume you have already decided on what you wan to display in your acrylic enclosure. Begin the building process by first creating a design to ascertain the dimensions of your box. Take the measurements of the object(s) you want to display. Essentially, your display box should be 2 inches larger than the object in width, length and height. For instance, if you have a trophy that is 6-inches long, 4-inches wide and 4-inches tall, your display case should be two side panes measuring 8 –by-6 inches, two other side panels measuring 6-by-6 inches and a top panel measuring 8-by-6 inches. Calculate all the dimensions of your case and note down the sizes of all the 5 panels you will need.
Remember to compensate for the width of the top acrylic panel by adding an extra width that is twice the thickness of your acrylic sheet to the top panel. In addition to the objects you intend to display in the case, take into consideration the size and dimensions of the area that your case will be placed. At this point, you may want to reconsider the heights of your shelves in case you need more height for your display box.
Step 2 –Preparation
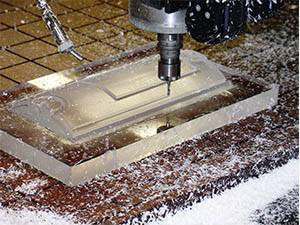
Start by gathering all the materials you need and clearing the area of work. If possible, obtain acrylic sheets that have been pre-cut to your appropriate sizes. Otherwise, you can cut your sheets into panels by using a table saw fitted with a blade for cutting acrylic. A circular saw, jigsaw, saber saw, or handsaw can also do the job just fine. Be sure to wear protective gear while cutting the sheets to prevent fine specks from flying into your eyes The acrylic sheets often come with a film of protective covering stuck on it; leave this on until you are done with the cutting. Sand down the edges of the acrylic panels starting with a 120 -grit sandpaper through to the 600 -grit sandpaper. You can now peel off the protective film.
Step 3 – Dry Fit
Lay out the acrylic panels that will make up the sides and top of your display box. Dry fit the pieces using a masking tape to find out whether the case can be assembled the way you want it. Start with the back panel lying flat and position one of the side panels in place followed by the other side panel and the top. Undo the dry testing assembly by removing the masking tape and laying the panels out flat again.
Step 4 – Assemble
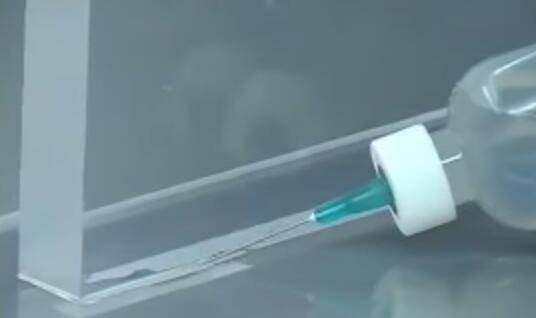
Once you have confirmed that all the panels fit correctly, start the process of assembling. Lay one of the sides flat on ground and carefully apply acrylic glue to the side. Attach one of the other sides at a 90 degrees angle. Give it about 30 minutes to dry and do the same with the top and bottom panels until you have a case without a back. Apply the Angle clamps to the pieces to firmly secure them together and allow the acrylic glue to have a firm grip. Wipe off any excessive glue from the inside using a rag. Apply Solvent cement or silicone caulk along the inner seems of the box. If possible, use a needle-nose applicator. Wait for a day for the acrylic glue to cure.
Place the remaining side panel on top of your case and determine where you want to place the hinges and mark these positions. This should ideally be positioned slightly in the middle and an equal distance from either side of the panel. Attach the hinges to the remaining side panel; first, drill slightly smaller holes in marked positions using a slow drill setting. Sink the bolts against the hinges on both sides. And that is it!
Tips & Warnings
· For additional security, glue the seams from outside as well after the inner glue has dried. Use masking tape on the inner seams to prevent glue from running.
· Do not use too much solvent cement if you are using acrylic glue
· Be cautious when using power tools. Wear protective goggles to protect your eyes when sanding, cutting or filling materials
. If the thickness of the acrylic sheet is less that 1/8 inches, you can score the sheet along the measurement lines using a utility knife and then bending to break the sheet.
. Use protective work gloves at all times when handing the acrylic sheet as this may be as hazardous as glass material.

If you would like a quotation or further information on this product, please
contact us and we will reply to you within 1 working day.

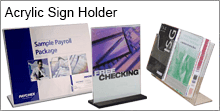
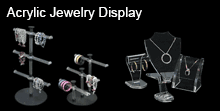
Users Who Viewed Items In Your Recent History Also Viewed